The purpose of the design phase
Design is all about shaping concepts into visuals (of some kind) that can be refined/improved through testing.
Techniques that might be used include:
- Thumbnails
- Point of view
- Characters
- Composition
- Visual style
- Layout
- Type
- Colour
- Making approaches
The outputs should provide enough information for me to commit to creating artwork for each of the six illustrations.
There is a certain amount of overlap with earlier phases of work. for example, visual style was explore and tested during 4.2 Generate ideas.
A video summary
Overall design
The number of illustrations, the dimensions and subjects for each had already been defined during the previous phases.

The design for each image is considered separately below.
Illustration 1 – Establishing shot
The establishing shot is the first illustration in the story and, along with the first paragraph, is a kind of memento mori to the reader (an object kept as a reminder of the inevitability of death).
The first paragraph of the story: The most sacred of all the days of our life is the day we die. It is holy, it is the great day of change, of transformation. Have you ever seriously thought about the hour that is certain to come and will be your last hour on earth?
I wanted the illustration to transport the reader to their own funeral and what that might be like.
Thumbnails
The idea and initial thumbnails were created as part of the doodle sketching exercise in 4.2 Generate ideas.


I was generally happy with the approach and created several more thumbnails looking at how the paragraph of text might appear.

I like the overall composition with the strong leading line cutting the image in two, and use of negative space to give the text space to breath.
This first image will be created in black and white, so no colour thumbnails are necessary.
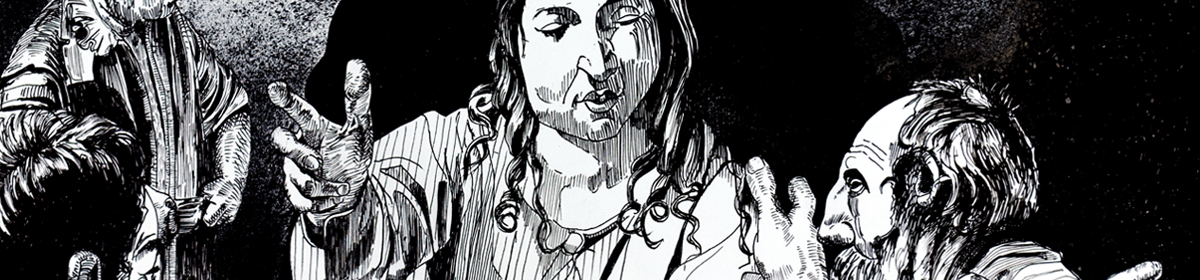
Illustration 2 – The Angel of Death takes the man’s soul
This illustration will use model making as the creative approach. The models have been created but the design and composition needed to be tested.

I want the image to have quite a dynamic point of view. One of the design principles taken from my practice research is to use facial and hand expression as much as possible to communicate narrative.
The thumbnail I developed further is the one on the far right of the middle row. I like the arrangement of the foreground, midground and background. The dead man’s right hand and both hands of the Angel are visible, as well as each character’s expression.
I like the prison like feeling caused by the bedstead. As well as creating a strong compositional shape it’s symbolic i.e. the man’s soul being freed from the prison of the earthy body.
The visual style and use of colour will be taken from the test image I created during 4.2 Generating ideas.

Illustration 3 – A strange masquerade
The third illustration will use the layout and design generated from the cut and fold creative approach that was explored during 4.2 Generate ideas.

I hadn’t considered use of colour for this image, so this was thumbnailed by simply working on top of digital prints of the picture.


Illustration 4 – Strange birds
A friend who works at a infants school lent me a box of dolls – at the time of writing the kids are on the summer holiday break. This opened up all sorts of possibilities from a model perspective.

From a creative perspective it reminded me of the cherub reference I’d photographed in Hampton Court Palace

I thought it would be an interesting idea to subvert the heavenly cherub idea and use angry cherubs as the strange birds.
I did a quick sketch to get a feel for if this would work.

I then gave myself 20-minutes to create 10 x thumbnails exploring different points of view and compositions.

Illustration 5 – Sharp stones
I was really stumped with what to do for this illustration. All my ideas seemed a bit obvious.
I used the rapid thumbnailing technique again and quite quickly pushed the boundaries of my thinking to an overhead point of view. I thought this was a really interesting approach that provided scope for experimenting with typography i.e. there would be lots of negative space to work with.

Illustration 6 – Who are you?
The thumbnails for the final image were created in a similar manner and resulted in a simple design and dynamic dramatic composition.
My main insight was to use a heavily stylised and silhouetted figure for the angel in a kind of Giacometti style. This would also mean working with a lot of negative space and open up opportunities for the typography.

Typography and page layout
In my brief I specified the need to mockup a single page with text and image. I decided that the first illustration would be strong because the text is impactful and would provide context for the remaining images.
When I started to mock-up the text layout I felt like the nature of the way I wanted the text and image to work together meant that I needed to create the layout for each illustration. I realised that the shape, form and meaning of the text is another visual element for me to use.
I’d successfully used thumbnails as the basis for a quite complex text mock-up in Assignment 3 – A graphic short story, and found there were a number of advantages of working in this way. The main ones being:
- The positioning of the text is likely to affect the image composition – so it needs to be done before artworking starts
- Working to scale means that compositing the final illustrations and text together is simply a case of replacing the thumbnail in the mockup with the finished artwork, and minor tweaks to the text layout.
Working with the finished page dimensions also allowed me to make adjustments to the compositions so that they would successfully fit the correct page size.
I selected the thumbnails I wanted to work with and created a Photoshop document with grouped layers for each of the six illustrations.
I created a two column grid layout that formed the basis for the design.

I then used a simple typographical design:
- Times Regular – for descriptive text
- Times Bold – for dialogue
I then applied these two design principles to the thumbnails.


I was surprised at how much I enjoyed the process because it felt like the illustrations really started to come to life with the flow of the text influencing the reading, and therefore the layout and composition of the images.
I really liked the simplicity of some of the thumbnails and began to question whether I should adopt a more rapid making approach to try and exploit that visual style.
Following this process made me re-arrange a number of the images so that flowed better with the text. For example, I completely flipped the final image around so that the dialogue followed the positioning of the characters.
Reflections
- The rapid thumbnailing technique really works well for me and helps break through any procrastination
- Doing the text layout for each image was a great decision and really injected some excitement into the creative process.
- Creating text mockups at actual size using thumbnails is an excellent ‘low-fi’ technique with many benefits
- It felt like the design stage was a nice synthesis of my visual research and creative approaches
